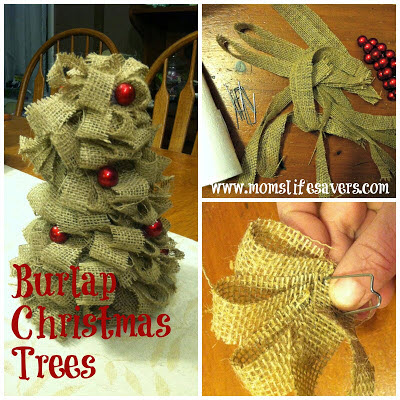
Burlap Christmas Trees DIY
Make your table a little more merry with this Burlap Christmas Trees DIY.
We are seeing so many great burlap holiday decorations from buntings to packaging, burlap is turning up everywhere! Recently I purchased a table runner made of burlap, and burlap Santa sacks for the kids – I’m even decorating with burlap ribbon!
These Burlap Christmas Trees come together quickly and with just a few supplies – have fun making them.
Here’s what you need:
- 1 Styrofoam cone, we got ours at the DollarTree
- Floral pins or common pins – you can Floral Pins at your local arts and crafts store – these work great to hold the burlap to the cone but I have to confess, when I ran out I just used common pins to finish it off!
- Strips of burlap or burlap ribbon – we used strips of burlap approximately 1 1/4 inches wide by 18″ – I had purchased a piece of burlap from our fabric store and used it for another project – these were just the left over pieces.
- Berry floral pick – optional I wanted to add some berries to the trees I was making so I purchased a single holiday wreath/decorative pick and cut the ‘berries’ off and hot glued them in place
- Hot Glue (for attaching berries)
- Scissors
Instructions
- Gather your supplies and cut your strips of burlap.
- Taking one end of the burlap strip, create a series of overlapping loops, gathering them all at the base of the ‘fan’.
- Place a floral pin through the base of the loop ‘fan’
- Press the pinned burlap to the base of the craft cone and repeat, working your way up the cone form
- Once you have filled the cone form with burlap loops, trim burlap ends to give it a more finished look
- Add artificial berries or ornaments to your liking!
Enjoy!


Leave a Reply