Mardi Gras Masks Craft Tutorial

Mardi Gras Masks Craft Tutorial Mom’s Lifesavers
We’ve got over 3 feet of snow on the ground here in New England and we’re looking for something fun to beat cabin fever, so we’re imagining we’re in New Orleans and it’s Mardi Gras.
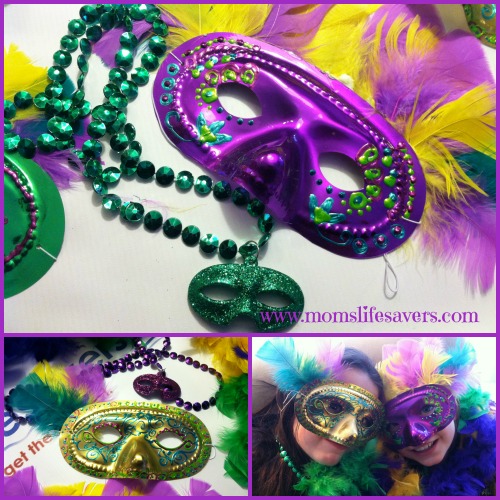
We’ve got a great #DollarTree inspired craft using metallic masks that we found at our local DollarTree along with colorful feathers. We also purchased a few strings of beads and a feather boa to set the scene. Using some tacky glue and Liquid Pearls (dimensional paint) the kids had a blast making these masks for our family Mardi Gras celebration.
Supplies

Mardi Gras Masks Craft Tutorial Mom’s Lifesavers
We found our masks and feathers at DollarTree, for only $2 we had enough supplies to make 6 masks. Additional supplies used:
- 1, 6 pack of Metallic Masks
- Package of Craft Feathers
- Tacky Glue (Arlene’s Tacky Glue – in the gold bottle, it dries clear)
- Dimensional Paint (We got ours at Michael’s)
- Scissors, scrap paper and table cover
Mardi Gras Masks Craft Tutorial Mom’s Lifesavers
Getting Started
- Cover your work area – trust us, this step makes the craft more fun and takes the stress out of paint, glue and feathers ending up on your table.
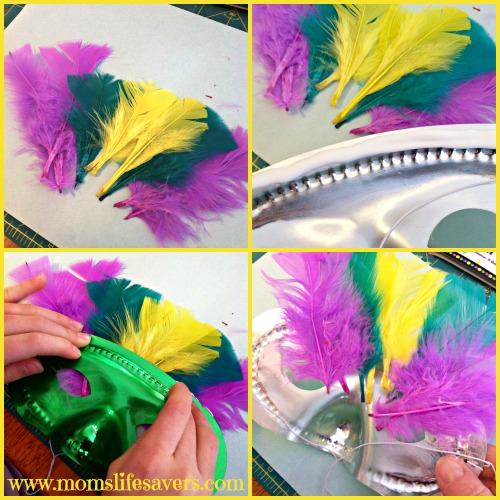
- Select your mask and the feathers you would like to add to it.
- Place the feathers on a piece of paper or work surface in the order you want them to appear on the top of the mask. Do not worry about covering the eye holes, once the feathers are dry it is very easy to cut them so that they are not in the way of the eyes. (See image above)
- Place tacky glue along the top, back of the mask and place the mask, right side up onto the feathers.
- Press the mask onto the feathers, then flip the mask over and add any additional glue to hold the feathers in place.
- Let the glue dry and use the dimensional paint to add patterns, lines and dots to the mask – let the paint and glue dry thoroughly. Once the glue is dry, trim any feathers that are in the eye area of the mask.
- Enjoy celebrating Mardi Gras with your new mask.
Mardi Gras Masks Craft Tutorial Mom’s Lifesavers


Leave a Reply